вівторок, 24 листопада 2020 р.

MS SQL Transactions

BUT here are some things to note about transactions (at least in SQL Server):

  • There is only ever one real transaction (the first one), no matter how many times you call BEGIN TRAN

    • You can name a transaction (as you have done here) and that name will appear in the logs, but naming only has meaning for the first / outer-most transaction (because again, the first one is the transaction).
    • Each time you called BEGIN TRAN, whether or not it is named, the transaction counter is incremented by 1.
    • You can see the current level by doing SELECT @@TRANCOUNT;
    • Any COMMIT commands issued when @@TRANCOUNT is at 2 or above do nothing more than reduce, one at a time, the transaction counter.
    • Nothing is ever committed until a COMMIT is issued when the @@TRANCOUNT is at 1
    • Just in case the information above does not indicate clearly: regardless of the transaction level, there is no actual nesting of transactions.
  • Save points allow for creating a subset of work within the transaction that can be undone.

    • Save points are created/marked via the SAVE TRAN {save_point_name} command
    • Save points mark the beginning of the subset of work that can be undone without rolling back the entire transaction.
    • Save point names do not need to be unique, but using the same name more than once still creates distinct save points.
    • Save points can be nested.
    • Save points cannot be committed.
    • Save points can be undone via ROLLBACK {save_point_name}. (more on this below)
    • Rolling back a save point will undo any work that happened after the most recent call to SAVE TRAN {save_point_name}, including any save points created after the one being rolled-back was created (hence the "nesting").
    • Rolling back a save point has not effect on the transaction count/level
    • Any work done prior to the initial SAVE TRAN cannot be undone except by issuing a full ROLLBACK of the entire transaction.
    • Just to be clear: issuing a COMMIT when @@TRANCOUNT is at 2 or above, has no effect on save points (because again, transaction levels above 1 don't exist outside of that counter).
  • You cannot commit specific named transactions. The transaction "name", if provided along with the COMMIT, is ignored and only exists for readability.

  • A ROLLBACK issued without a name will always rollback ALL transactions.

  • A ROLLBACK issued with a name must correspond to either:

    • The first transaction, assuming it was named:
      Assuming no SAVE TRAN has been called with the same transaction name, this will rollback ALL transactions.
    • A "save point" (described above):
      This behavior will "undo" all changed made since the most recent SAVE TRAN {save_point_name} was called.
    • If the first transaction was a) named and b) has had SAVE TRAN commands issued with its name, then each ROLLBACK of that transaction name will undo each save point until there are none left of that name. After that, a ROLLBACK issued of that name will rollback ALL transactions.
    • For example, assume the following commands were run in the order shown:

      BEGIN TRAN A -- @@TRANCOUNT is now 1
      -- DML Query 1
      SAVE TRAN A
      -- DML Query 2
      SAVE TRAN A
      -- DML Query 3
      
      BEGIN TRAN B -- @@TRANCOUNT is now 2
      SAVE TRAN B
      -- DML Query 4
      

      Now, if you issue (each of the following scenarios is independent of each other):

      • ROLLBACK TRAN B once: It will undo "DML Query 4". @@TRANCOUNT is still 2.
      • ROLLBACK TRAN B twice: It will undo "DML Query 4" and then error as there is no corresponding save point for "B". @@TRANCOUNT is still 2.
      • ROLLBACK TRAN A once: It will undo "DML Query 4" and "DML Query 3". @@TRANCOUNT is still 2.
      • ROLLBACK TRAN A twice: It will undo "DML Query 4", "DML Query 3", and "DML Query 2". @@TRANCOUNT is still 2.
      • ROLLBACK TRAN A thrice: It will undo "DML Query 4", "DML Query 3", and "DML Query 2". Then it will rollback the entire transaction (all that was left was "DML Query 1"). @@TRANCOUNT is now 0.
      • COMMIT once: @@TRANCOUNT goes down to 1.
      • COMMIT once and then ROLLBACK TRAN B once: @@TRANCOUNT goes down to 1. Then it will undo "DML Query 4" (proving that COMMIT didn't do anything) . @@TRANCOUNT is still 1.
  • Transaction names and save point names:

    • can have up to 32 characters
    • are treated as having a binary Collation (not case-sensitive as the documentation currently states), regardless of the Instance-level or Database-level Collations.
    • For details, please see the Transaction Names section of the following post: What’s in a Name?: Inside the Wacky World of T-SQL Identifiers
  • A stored procedure is not, in itself, an implicit transaction. Each query if no explicit transaction has been started, is an implicit transaction. This is why explicit transactions around single queries are not necessary unless there can be a programmatic reason to do a ROLLBACK, else any error in the query is an automatic rollback of that query.

  • When calling a stored procedure, it must exit with the value of @@TRANCOUNT being the same as when it was called. Meaning, you cannot:

    • Start a BEGIN TRAN in the proc without committing it, expecting to commit in the calling/parent process.
    • You cannot issue a ROLLBACK if an explicit transaction was started prior to the proc being called as it will return @@TRANCOUNT to 0.

    If you exit a stored procedure with a transaction count that is either higher or lower than when it stared, you will get an error similar to:

    Msg 266, Level 16, State 2, Procedure YourProcName, Line 0
    Transaction count after EXECUTE indicates a mismatching number of BEGIN and COMMIT statements. Previous count = X, current count = Y.

  • Table Variables, just like regular variables, are not bound by transactions.


Regarding having transaction handling in procs that can either be called independently (and hence need transaction handling) or call from other procs (hence not needing transaction handling): this can be accomplished in a couple different ways.

The way that I have been handling it for several years now that seems to work well is to only BEGIN / COMMIT / ROLLBACK at the outer-most layer. Sub-proc calls just skip the transaction commands. I have outlined below what I put into each proc (well, each one that needs transaction handling).

  • At the top of each proc, DECLARE @InNestedTransaction BIT;
  • In place of simple BEGIN TRAN, do:

    IF (@@TRANCOUNT = 0)
    BEGIN
       SET @InNestedTransaction = 0;
       BEGIN TRAN; -- only start a transaction if not already in one
    END;
    ELSE
    BEGIN
       SET @InNestedTransaction = 1;
    END;
    
  • In place of simple COMMIT, do:

    IF (@@TRANCOUNT > 0 AND @InNestedTransaction = 0)
    BEGIN
       COMMIT;
    END;
    
  • In place of simple ROLLBACK, do:

    IF (@@TRANCOUNT > 0 AND @InNestedTransaction = 0)
    BEGIN
       ROLLBACK;
    END;
    

This method should work the same regardless of whether the transaction was started within SQL Server or if it was started at the app layer.

For the full template of this Transaction handling within the TRY...CATCH construct, please see my answer to the following DBA.SE question: Are we required to handle Transaction in C# Code as well as in stored procedure.


Moving beyond the "basics", there are some additional nuances of transactions to be aware of:

  • By default, Transactions are, most of the time, not automatically rolled-back / cancelled when an error occurs. This is usually not a problem as long as you have proper error handling and call ROLLBACK yourself. However, sometimes things get complicated, such as in the case of batch-aborting errors, or when using OPENQUERY (or Linked Servers in general) and an error occurs on the remote system. While most errors can be trapped using TRY...CATCH, there are two that cannot be trapped that way (can't remember which ones at the moment, though--researching). In these cases, you must use SET XACT_ABORT ON to properly rollback the Transaction.

    SET XACT_ABORT ON causes SQL Server to immediately roll-back any Transaction (if one is active) and abort the batch if any error occurs. This setting existed prior to SQL Server 2005, which introduced the TRY...CATCH construct. For the most part, TRY...CATCH handles most situations and so mostly obsoletes the need for XACT_ABORT ON. However, when using OPENQUERY (and possibly one other scenario that I can't remember at the moment), then you will still need to use SET XACT_ABORT ON;.

  • Inside of a Trigger, XACT_ABORT is implicitly set to ON. This causes any error within the Trigger to cancel the entire DML statement that fired the Trigger.

  • You should always have proper error handling, especially when using Transactions. The TRY...CATCH construct, introduced in SQL Server 2005, provides a means of handling nearly all situations, a welcome improvement over testing for @@ERROR after each statement, which didn't help much with batch-aborting errors.

    TRY...CATCH introduced a new "state", however. When not using the TRY...CATCH construct, if you have an active Transaction and an error occurs, then there are several paths that can be taken:

    • XACT_ABORT OFF and statement-aborting error: Transaction is still active and processing continues with the next statement, if any.
    • XACT_ABORT OFF and most batch-aborting errors: Transaction is still active and processing continues with the next batch, if any.
    • XACT_ABORT OFF and certain batch-aborting errors: Transaction is rolled-back and processing continues with the next batch, if any.
    • XACT_ABORT ON and any error: Transaction is rolled-back and processing continues with the next batch, if any.


    HOWEVER, when using TRY...CATCH, batch-aborting errors do not abort the batch, but instead transfer control to the CATCH block. When XACT_ABORT is OFF, the Transaction will still be active the vast majority of the time, and you will need to COMMIT, or most likely, ROLLBACK. But when encountering certain batch-aborting errors (such as with OPENQUERY), or when XACT_ABORT is ON, the Transaction will be in a new state, "uncommitable". In this state you cannot COMMIT, nor can you do any DML operations. All you can do is ROLLBACK and SELECT statements. However, in this "uncomittable" state, the Transaction was rolled-back upon the error occurring, and issuing the ROLLBACK is just a formality, but one that must be done.

    A function, XACT_STATE, can be used to determine if a Transaction is active, uncommitable, or doesn't exist. It is recommended (by some, at least) to check this function in the CATCH block to determine if the result is -1 (i.e. uncommitable) instead of testing if @@TRANCOUNT > 0. But with XACT_ABORT ON, that should be the only possible state to be in, so it seems that testing for @@TRANCOUNT > 0 and XACT_STATE() <> 0 are equivalent. On the other hand, when XACT_ABORT is OFF and there is an active Transaction, then it is possible to have a state of either 1 or -1 in the CATCH block, which allows for the possibility of issuing COMMIT instead of ROLLBACK (although, I cannot think of a case for when someone would want to COMMIT if the Transaction is commitable). More information and research on using XACT_STATE() within a CATCH block with XACT_ABORT ON can be found in my answer to the following DBA.SE question: In what cases a transaction can be committed from inside the CATCH block when XACT_ABORT is set to ON?. Please note that there is a minor bug with XACT_STATE() that causes it to falsely return 1 in certain scenarios: XACT_STATE() returns 1 when used in SELECT with some system variables but without FROM clause


Notes about the original code:

  • You can remove the name given to the transaction as it is not helping any.
  • You don't need the BEGIN and END around each EXEC call


вівторок, 6 жовтня 2020 р.

Indy HTTP DELETE request with a body

Below is a code shows how to send DELETE request with a body. So an input body stream could consists with the JSON\XML or whatever you want.

type
  TIdHTTPAccess = class(TIdHTTP)
  end;

...
var
  IdHTTP: TIdHTTP;
...

function DELETE_HTTP(AURL, ABody: String): String;
var
  bodyStream: TStringStream;
  responseStream: TStringStream;
begin
  Result := '';
  IdHTTP.Request.ContentType := 'application/xml';
  IdHTTP.Request.AcceptCharSet := 'utf-8';
  responseStream := TStringStream.Create('', TEncoding.UTF8);
  try
    bodyStream := TStringStream.Create(ABody, TEncoding.UTF8);
    try
      TIdHTTPAccess(IdHTTP).DoRequest('DELETE', AURL, bodyStream, responseStream, []);
      if
        Assigned(responseStream)
        and(responseStream.DataString.Length > 0)
      then
      begin
        Result := responseStream.DataString;
      end;
    finally
      FreeAndNil(bodyStream);
    end;
  finally
    FreeAndNil(responseStream);
  end;
end;

середа, 30 вересня 2020 р.

Online graphical editor

Online graphic editor:

https://sketch.io/sketchpad/

Gives a possibility to create very nice vector graphic images, has a large library of sampled objects.

понеділок, 21 вересня 2020 р.

Xamarin: Right-bottom button over the controls

If you're finding a way how to design a buton over the controls, it looks like this:

    <ContentPage.Content>
    <RelativeLayout>
      <Grid>
        <Grid.RowDefinitions>
          <RowDefinition Height="30" />
          <RowDefinition Height="*" />
        </Grid.RowDefinitions>
        <Grid.ColumnDefinitions>
          <ColumnDefinition Width="*" />
        </Grid.ColumnDefinitions>
        <Grid.Triggers>
          <DataTrigger TargetType="Grid" Binding="{Binding IsBusy}" Value="True">
            <Setter Property="IsVisible" Value="False" />
          </DataTrigger>
        </Grid.Triggers>
        <StackLayout 
                Grid.Row="0"
                Grid.Column="0">
          <Label Text="List"
                       FontAttributes="Bold"
                       FontSize="Large"
                       VerticalOptions="Start"
                       HorizontalOptions="Center"
                       Margin="0, 0, 0, 0" />
        </StackLayout>
        <StackLayout 
                Grid.Row="1"
                Grid.Column="0"
                Margin="10">
          <ListView
                    x:Name="list"
                    ItemsSource="{Binding List}"
                    IsVisible="True"
                    SeparatorVisibility="Default"
                    HasUnevenRows="true"
                    ItemTapped="List_ItemTapped"
                    SelectionMode="Single">
            <ListView.ItemTemplate>
              <DataTemplate>
                <ViewCell>
                  <StackLayout
                                    x:Name="Item"
                                    Orientation="Horizontal"
                                    HeightRequest="190"
                                    >
                    
                    <StackLayout.GestureRecognizers>
                      <TapGestureRecognizer
                                            NumberOfTapsRequired="1"
                                            Tapped="Item_TapGestureRecognizer_Tapped_1"
                                            CommandParameter="{Binding Source={x:Reference Item}, Path=BindingContext}"
                                        />
                    </StackLayout.GestureRecognizers>
                  </StackLayout>
                </ViewCell>
              </DataTemplate>
            </ListView.ItemTemplate>
          </ListView>
          <Label Text="Brak kart w aplikacji"
                       VerticalOptions="CenterAndExpand"
                       HorizontalOptions="CenterAndExpand"
                       IsVisible="{Binding IsEmpty}"
                       />
        </StackLayout>
        <ContentView Grid.Row="0"
                         Grid.Column="0"
                         IsVisible="{Binding IsBusy}"
                         BackgroundColor="#222222" 
                         Opacity="0.5"
                         AbsoluteLayout.LayoutFlags="All"
                         AbsoluteLayout.LayoutBounds="0,0,1,1"
                         >
          <ActivityIndicator IsRunning="True"
                        Color="{StaticResource ButtonBackgroundColor}"
                        VerticalOptions="CenterAndExpand"
                        HorizontalOptions="CenterAndExpand" />
        </ContentView>
        
      </Grid>
      <RelativeLayout x:Name="PlusButton" 
                        WidthRequest="100"
                        HeightRequest="100"
                        HorizontalOptions="End" 
                        VerticalOptions="End"                      
                        RelativeLayout.YConstraint="{ConstraintExpression Type=RelativeToParent, Property=Y, Factor=0,Constant=0}"
                        RelativeLayout.XConstraint="{ConstraintExpression Type=RelativeToParent, Property=X, Factor=1, Constant=0}"
                        RelativeLayout.HeightConstraint="{ConstraintExpression Type=RelativeToParent, Property=Height, Factor=1,Constant=0}"
                        RelativeLayout.WidthConstraint="{ConstraintExpression Type=RelativeToParent, Property=Width,Factor=1,Constant=0}"
                          >
        <ImageButton                             
                        Source="plus.png"
                        BackgroundColor="Transparent"
                        Clicked="PlusButton_Clicked"
                    />
      </RelativeLayout>
    </RelativeLayout>
  </ContentPage.Content>
</ContentPage>

Bold is actually that RelativeLayout with the plus Image (buton). If you'd like to move the buton somewhere else, you have to change Factor value.

середа, 2 вересня 2020 р.

Helpful adb commands (How to stop an Android Emulator from Command Line)

Find adb.exe on your computer.
You have to use
adb kill-server
or
adb -s emulator-5554 emu kill
, where
emulator-5554
is the emulator name.
For Ubuntu users:
adb devices | grep emulator | cut -f1 | while read line; do adb -s $line emu kill; done

# Fully Uninstall an app on an emulator:
adb shell "pm uninstall <your packet name, f.e. com.nl.hello.world>"

# Uninstall an app on an emulator with the local data saving:
adb shell "pm uninstall -k <your packet name, f.e. com.nl.hello.world>"

# Install a previously copied app on an emulator:
adb shell "pm install -r /storage/00BC-1AFD/temp/v1.0/<your packet name, f.e. com.nl.hello.world>.apk"

# restart adb to be able to use device via WiFi
 adb kill-server &&  adb start-server && adb tcpip 5555 && adb connect 192.168.0.14:5555

# How do I find out which keystore was used to sign an app?:
First, unzip the APK and extract the file /META-INF/ANDROID_.RSA (this file may also be CERT.RSA, but there should only be one .RSA file).
cd "c:\Program Files (x86)\Android\android-sdk\platform-tools\"
keytool -printcert -file ANDROID_.RSA

# Then use the keytool again to print out all the aliases of your signing keystore:
cd "c:\Program Files (x86)\Android\android-sdk\platform-tools\"
keytool -list -keystore my-signing-key.keystore


субота, 15 серпня 2020 р.

How to create a self-signed SSL certificate?


What is SSL Certificate?

An SSL (Secure Sockets Layer) certificate is a digital certificate that validates the identity of a website and encrypts information sent to the server using SSL technology. Encryption is the way toward scrambling information into an undecipherable arrangement that must be come back to a clear organization with the correct decryption key.

A certificate serves as an electronic “passport” that sets up an online element’s certifications while working together on the Web. When an Internet user attempts to send confidential information to a Web server. The client’s program gets to the server’s digital certificate and establishes a secure connection.

SSL certificate

What Is Open SSL?

OpenSSL is an open source implementation of the SSL and TLS protocols. It provides an encryption transport layer on top of the normal communications layer. Allowing it to be intertwined with many network applications and services. The default SSL Profile in the Cloud Management Console has a generic Common Name. When associating an SSL profile to a Gateway Cluster? If using the default SSL Profile, your application making API calls may fail to verify the host name. It is connecting to against the certificate presented. In this case, you can generate a new self-signed certificate that represents a common name your application can validate. This topic tells you how to generate self-signed SSL certificate requests using the OpenSSL toolkit to enable HTTPS connections.

OpenSSL is often used to encrypt authentication of mail clients and to secure web based transactions such as credit card payments. Some ports, such as www/apache24 and databases/postgresql91-server. Include a compile option for building with OpenSSL.

OpenSSL is a robust, commercial-grade, and full-featured toolkit for the Transport Layer Security (TLS) & Secure Sockets Layer (SSL) protocols. It is also a general-purpose cryptography library.

OpenSSL is licensed under an Apache-style license. Which basically means that you are free to get and use it for commercial and non-commercial purposes subject to some simple license conditions.

To Create self-signed SSL certificate on Windows system using OpenSSL follow below Steps.

First install the OpenSSL

1. To create the self-signed SSL certificate first you have to install the OpenSSL application in your windows system. You can download the application from here.OpenSSL-installtion

Install the software in “C:\Program Files\OpenSSL-Win64” location. Then Click Next and finish the installation.

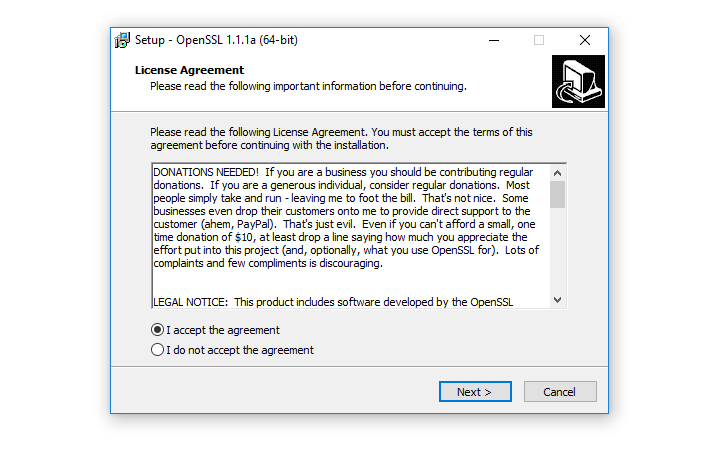
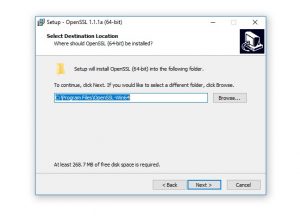
2. After completing the installation open the command prompt

Create a temporary directory “demo”

>md demo

> cd demo

> set RANDFILE=c:\demo\.rnd

set OPENSSL_CONF=C:\Program Files\OpenSSL-Win64\bin\openssl.cfg

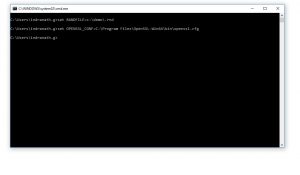
3. Now lunch the openssl.exe by running the below command

> “C:\Program Files\OpenSSL-Win64\bin\openssl.exe”

Use the “” to run the command

4. Now you have to create key file for your CA certificate

> genrsa -out can.key 2048


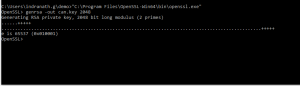
5. Now create the root CA certificate using the key file
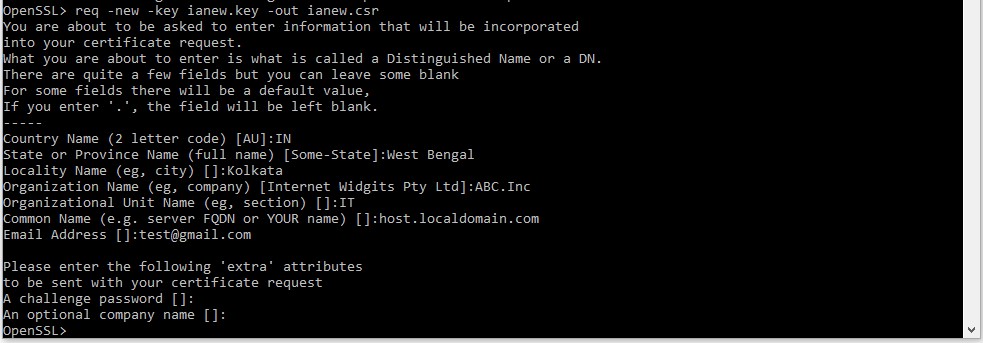
> req -new -x509 -days 1826 -key can.key -out canew.crt

It will ask for some details like Country Name, Sate, City, Organization Name FQDN name. FQDN name should be your domain name who have the certificate authority of your domain.


6. Now generate public key for your application SSL certificate.

>genrsa -out ianew.key 2048

7. Now create a CSR with the newly created public key “ianew.key”

> req -new -key ianew.key -out ianew.csr

It will ask for some details like Country Name, Sate, City, Organization Name and FQDN name. FQDN name should be your host/computer FQDN name of you web server or application server.


8. Now singed the csr certificate with you root CA certificate which you created in step no 2.

> x509 -req -days 1826 -in ianew.csr -CA canew.crt -CAkey can.key -set_serial 01 -out ianew.crt

Now your self sign-certificate is ready You have to install the root ca certificate on your client system to avoid the certificate error.

certificate

Now you can deploy the self-signed SSL certificate to your web server hosted in Windows or Linux. This easy way you can create self-signed SSL certificate on Windows by using OpenSSL.


It was just a report of a topic How to create self-signed SSL certificate?
And it works nice.
Here are another few interesting links:

In short, I did the steps below:
F.e. if you would like to generate a certificate for something.com host, you have to follow steps below. Steps are mostly the same as are described in the "instructions" link above. The differences are mostly in the file names.
1. Download OpenSSL
https://slproweb.com/products/Win32OpenSSL.html
2. Run cmd.exe with an Admin rights and go to the OpenSSL location
3. Run OpenSSL.exe
4. type "genrsa -out webservice.key 2048"
5. type "req -new -x509 -days 99999 -key webservice.key -out webservice.crt"
6. type "genrsa -out webservice_pub.key 2048"
7. type "req -new -key webservice_pub.key -out webservice_pub.csr"
It will ask for some details like Country Name, Sate, City, Organization Name and FQDN name. FQDN name should be your host/computer FQDN name of your web server or application server.
8. type "x509 -req -days 99999 -in webservice_pub.csr -CA webservice.crt -CAkey webservice.key -set_serial 01 -out webservice_pub.crt"
9. 5 generated files are in "c:\Program Files\OpenSSL-Win64\bin\