неділя, 15 грудня 2019 р.

Delphi - Opening TWebBrowser external link in default browser

  1. unit Unit1;
  2. interface
  3. uses
  4.   Windows, Messages, SysUtils, Variants, Classes, Graphics, Controls, Forms,
  5.   Dialogs, StdCtrls, ActiveX, OleCtrls, SHDocVw;
  6. const
  7.   DISPID_NEWWINDOW3 = 273;
  8. type
  9.   TWebBrowserNewWindow3 = procedure(ASender: TObject; var ppDisp: IDispatch; var Cancel: WordBool;
  10.     dwFlags: Longint; const bstrUrlContext: WideString; const bstrUrl: WideString) of object;
  11.   TWebBrowser = class(SHDocVw.TWebBrowser)
  12.   private
  13.     FOnNewWindow3: TWebBrowserNewWindow3;
  14.   protected
  15.     procedure InvokeEvent(ADispID: TDispID; var AParams: TDispParams); override;
  16.   public
  17.     property OnNewWindow3: TWebBrowserNewWindow3 read FOnNewWindow3 write FOnNewWindow3;
  18.   end;
  19. type
  20.   TForm1 = class(TForm)
  21.     WebBrowser1: TWebBrowser;
  22.     procedure FormCreate(Sender: TObject);
  23.   private
  24.     procedure WebBrowserNewWindow3(ASender: TObject; var ppDisp: IDispatch; var Cancel: WordBool;
  25.       dwFlags: Longint; const bstrUrlContext: WideString; const bstrUrl: WideString);
  26.   public
  27.     { Public declarations }
  28.   end;
  29. var
  30.   Form1: TForm1;
  31. implementation
  32. {$R *.dfm}
  33. { TWebBrowser }
  34. procedure TWebBrowser.InvokeEvent(ADispID: TDispID; var AParams: TDispParams);
  35. begin
  36.   if (ADispID = DISPID_NEWWINDOW3) and Assigned(FOnNewWindow3) then
  37.   Begin
  38.     FOnNewWindow3(Self, AParams.rgvarg^[4].pdispVal^,
  39.       AParams.rgvarg^[3].pbool^, AParams.rgvarg^[2].lVal,
  40.       WideString(AParams.rgvarg^[1].bstrVal), WideString(AParams.rgvarg^[0].bstrVal));
  41.   end
  42.   else
  43.     inherited;
  44. end;
  45. { TForm1 }
  46. procedure TForm1.FormCreate(Sender: TObject);
  47. const
  48.   URL = 'http://www.w3schools.com/;
  49. begin
  50.   WebBrowser1.OnNewWindow3 := WebBrowserNewWindow3;
  51.   WebBrowser1.Navigate(URL);
  52. end;
  53. procedure TForm1.WebBrowserNewWindow3(ASender: TObject; var ppDisp: IDispatch;
  54.   var Cancel: WordBool; dwFlags: Longint; const bstrUrlContext, bstrUrl: WideString);
  55. begin
  56.   Cancel := True;
  57.   ShowMessage(bstrUrl);
  58. end;
  59. end.
By default, it opens in InternetExplorer. Here is an alternative HTML view control.
Source

середа, 4 грудня 2019 р.

Setting up the dark theme in SQL Server management studio

Setting up the dark theme in SQL Server management studio

In SQL Server management studio 2016, Microsoft introduced a visual setting option to choose between the Blue and Light color theme. In both SSMS 2016 and the latest SSMS 17, the user can switch between the Blue or Light theme by going to Tools > Options > Environment > General > Color theme:
Options on the Tools menu in SQL Server Management Studio
SSMS Dark theme
Although it’s not officially supported by Microsoft, the Dark theme is also available in SQL Server management studio 2016, 17, and the latest 18 version. The dark theme has been very popular among SQL database administrators and developers. To enable the SSMS Dark theme, follow these simple steps.
Close SSMS if it is running. Run any text editor as an administrator, in this case, Notepad++ is used, in order to edit the SSMS configuration file:
Open with Notepad++ as Administrator Context Menu
The configuration (ssms.pkgundef) file is located at the following locations:
SSMS 2016
C:\Program Files (x86)\Microsoft SQL Server\130\Tools\Binn\ManagementStudio
SSMS 17
C:\Program Files (x86)\Microsoft SQL Server\140\Tools\Binn\ManagementStudio
SSMS 18
C:\Program Files (x86)\Microsoft SQL Server Management Studio 18\Common7\IDE
Depending on SSMS version, locate and open the configuration file (ssms.pkgundef) in the text editor:
Open the SSMS configuration file with Notepad++
Once the file is opened in the text editor, scroll down and find the section of the code under the “Remove Dark Theme” heading, add “//” (without quotation marks) at the beginning of the first line like shown below, and save the file:
SQL Server Management Studio configuration file opened in Notepad++
Once completed, start SQL Server management studio and the Dark color theme will be available in the Color theme drop-down box:
SQL Server Management Studio visual experience options
Each upgrade of the latest generation of SSMS will set the configuration file back to its defaults. This will, of course, overwrite the tweak we made earlier and the dark theme will no longer be available in the options.
Instead of doing the same steps to enable the SSMS Dark theme each time there is an upgrade, thanks to a reader (Luka Lovre) who made a PowerShell script, there’s an easier way with the same outcome which can be achieved in just a few clicks.
All we need to do is to run either Command Prompt or Windows PowerShell which is designed to improve the command-line and scripting. Either way, make sure to run the interpreter as an administrator or you’ll get an error message that access to the path is denied:
Running the script in Windows PowerShell without admin permissions
I’d go with the PowerShell because in some cases even upon successful execution of the script in Command Prompt, the changes are not applied (the case with SSMS 17.7). So, in this example, Windows PowerShell is used.
To run the PowerShell as an administrator, click Start, type PowerShell, right-click Windows PowerShell, and then choose Run as administrator:
Running Windows PowerShell as administrator
Depending on the version of SSMS, copy the appropriate script into the clipboard and hit Enter to run it:
SSMS 2016
powershell -Command "(gc 'C:\Program Files (x86)\Microsoft SQL Server\130\Tools\Binn\ManagementStudio\ssms.pkgundef') -replace '\[\`$RootKey\`$\\Themes\\{1ded0138-47ce-435e-84ef-9ec1f439b749}\]', '//[`$RootKey`$\Themes\{1ded0138-47ce-435e-84ef-9ec1f439b749}]' | Out-File 'C:\Program Files (x86)\Microsoft SQL Server\130\Tools\Binn\ManagementStudio\ssms.pkgundef'"
SSMS 17
powershell -Command "(gc 'C:\Program Files (x86)\Microsoft SQL Server\140\Tools\Binn\ManagementStudio\ssms.pkgundef') -replace '\[\`$RootKey\`$\\Themes\\{1ded0138-47ce-435e-84ef-9ec1f439b749}\]', '//[`$RootKey`$\Themes\{1ded0138-47ce-435e-84ef-9ec1f439b749}]' | Out-File 'C:\Program Files (x86)\Microsoft SQL Server\140\Tools\Binn\ManagementStudio\ssms.pkgundef'"
SSMS 18
powershell -Command "(gc 'C:\Program Files (x86)\Microsoft SQL Server Management Studio 18\Common7\IDE\ssms.pkgundef') -replace '\[\`$RootKey\`$\\Themes\\{1ded0138-47ce-435e-84ef-9ec1f439b749}\]', '//[`$RootKey`$\Themes\{1ded0138-47ce-435e-84ef-9ec1f439b749}]' | Out-File 'C:\Program Files (x86)\Microsoft SQL Server Management Studio 18\Common7\IDE\ssms.pkgundef'"
The successfully executed script in Windows PowerShell
There will be no return message that the operation succeeded except the blinking cursor on a new line.
Once either of those two methods is done, startup SSMS, and change the visual appearance to dark. Here’s how it looks:
SSMS Dark theme
Note: As we mentioned before, the SSMS Dark theme is not officially supported and it probably never be and that’s why it is disabled by default. There might be some visual deviations e.g. white background in the Object Explorer, Results grid, etc.

понеділок, 25 листопада 2019 р.

Resources to learn Git

If you plan to use or you are already using Git, below resources will be helful for you.

Learn by doing

Learn Git branching

Try Git commands right from your web browser. Featuring some of your soon-to-be favorites: branch, add, commit, merge, revert, cherry-pick, rebase!

Visualizing Git

Look under the hood! Explore how Git commands affect the structure of a repository within your web browser with a free explore mode, and some constructed scenarios.

Git-It

You’ve downloaded Git, now what? Download Git-It to your machine and you’ll get a hands-on tutorial that teaches you to use Git right from your local environment, using commands on real repositories.

Learn by reading

Git Handbook

Git, GitHub, DVCS, oh my! Learn all the lingo and the basics of Git.

Cheat Sheets

Keep these handy! Reference sheets covering Git commands, features, SVN migrations, and bash. Available in a multiple languages.

четвер, 14 листопада 2019 р.

Wyłączamy automatyczną instalację sterowników z Windows Update

W czerwcu wyszło na jaw, że oprogramowanie Samsunga może zablokować mechanizm Windows Update. Celem takiego działania nie było odcięcie od aktualizacji, lecz rozwiązanie ewentualnych problemów sprzętowych, jakie mogły nastąpić wskutek instalowania sterowników pochodzących od Microsoftu. W niektórych przypadkach warto samodzielnie decydować o tej kwestii.

Trzeba przyznać, że w wielu sytuacjach Windows Update okazuje się bardzo dobrym rozwiązaniem – przekonać się o tym mogą np. testerzy systemu Windows 10, którzy dzięki tej funkcji otrzymują sterowniki do wielu urządzeń. W wielu przypadkach tych samych sterowników nie znajdziemy na stronach producentów, jest to więc jedyny sposób na to, aby uruchomić sprzęt. Dodatkową zaletą jest cykliczne i automatyczne aktualizowanie tego typu oprogramowania. Dzięki niemu użytkownicy w ogóle nie muszą zaprzątać sobie tą kwestią głowy, a po prostu korzystać z systemu operacyjnego i programów.

Niestety czasami Windows Update może także wiele zepsuć i utrudnić klientom używanie ich sprzętu. Właśnie tak było w przypadku sprawy Samsunga: sterowniki pobierane ze stron Microsoftu nadpisywały te dostarczane przez producenta sprzętu, co doprowadzało do wyłączania portów USB 3.0. Nie jest to sytuacja pożądana, firma zdecydowała się więc na zablokowanie Windows Update. Tego typu siłowe rozwiązanie nie jest najlepszym wyjściem z sytuacji – lepiej samodzielnie decydować o tym, jakie sterowniki chcemy instalować. Te z Windows Update nie zawsze muszą okazać się idealne, o czym w swoich komentarzach informowali już użytkownicy korzystający z gładzików firmy Synaptic.

Sposób 1: Zmieniamy ustawienia systemowe


Na całe szczęście Microsoft pozostawił nam wolny wybór i w dowolnym momencie możemy zrezygnować z automatycznego instalowania sterowników w Windows Update. Opcji za to odpowiedzialnych nie znajdziemy jednak w panelu sterowania. Aby się do nich dostać, klikamy prawym przyciskiem myszy na ikonę Mój komputer i wybieramy pozycję właściwości. W przypadku systemów Windows 8, 8.1 i 10 możemy także kliknąć prawym przyciskiem myszy na ikonę ekranu startowego / menu start, a następnie wybrać z niej pozycję System. Następnie z menu po lewej stronie wybieramy opcję Zaawansowane ustawienia systemu. Tutaj mała uwaga: zmiana zachowania Windows Update będzie od nas wymagała uprawnień administracyjnych.


W oknie właściwości systemowych przechodzimy do zakładki Sprzęt, a następnie klikamy przycisk Ustawienia instalacji urządzeń. W oknie, które zobaczymy możemy wybrać zachowanie systemu Windows dotyczące automatycznego instalowania i aktualizowania sterowników urządzeń. Domyślnie zajmuje się tym system, możemy jednak samodzielnie decydować o pobieraniu danych, a także całkowicie zrezygnować z tego rozwiązania. W razie potrzeby możliwe jest zrezygnowanie jedynie z pobierania dodatkowego oprogramowania do sprzętu, jakim są np. specjalne panele kontrolne. System może pobierać jedynie niezbędne do działania sterowniki. Po wyborze odpowiadających nam ustawień zapisujemy zmiany.

Sposób 2: Edytor zasad grup lokalnych


Nie jest to jedyny sposób, aby zablokować automatyczne instalowanie sterowników. Drugą metodą jest wykorzystanie zasad grup lokalnych. Najpierw naciskamy kombinację klawiszy Windows + R lub z menu start wybieramy pozycję Uruchom. Następnie w okienku wpisujemy gpedit.msc i zatwierdzamy. Teraz pozostaje nam zmienić odpowiednie ustawienie. Aby się do niego dostać, z menu po lewej stronie rozwijamy i wybieramy kolejno Konfiguracja komputera – Szablony administracyjne – System – Zarządzanie komunikacją internetową – Internetowe ustawienia komunikacyjne. Następnie z listy po prawej stronie klikamy dwukrotnie pozycję Wyłącz wyszukiwanie sterowników urządzeń w usłudze Windows Update. W okienku jakie zobaczymy wybieramy Włączone, a następnie zmiany zatwierdzamy.


Sposób 3: Rejestru się nie boimy


Istnieje jeszcze jeden sposób, aby wyłączyć instalowanie sterowników. Wykorzystać możemy do tego edytor rejestru. Wbrew pozorom nie jest to zadanie trudne, a jeżeli nie naruszymy innych kluczy, całkowicie bezpieczne. Aby z niego skorzystać, wywołujemy okno uruchamiania kombinacją klawiszy Windows + R i wpisujemy w oknie regedit.exe. Opcjonalnie możemy także wyszukać tę aplikację przy pomocy ekranu startowego (o ile uruchomiliśmy wyświetlanie kafelków administracyjnych) lub menu start.

Kolejnym krokiem jest przejście do odpowiedniego klucza. Wybierając i rozwijając opcje z menu po lewej stronie, przechodzimy przez klucze: HKEY_LOCAL_MACHINE – SOFTWARE – Microsoft – Windows – CurrentVersion – DriverSearching. W panelu po prawej stronie powinniśmy zobaczyć wartość o nazwie SearchOrderConfig. Klikamy ją dwukrotnie. Domyślna wartość to 1, co oznacza automatyczne instalowanie sterowników. Możemy ją zmienić na 0, aby całkowicie wyłączyć ich instalowanie. Innym wyborem jest wartość 2: w takim przypadku system zainstaluje wymagane oprogramowanie tylko wtedy, gdy te nie zostanie odnalezione w systemie. Wybieramy najlepszą dla nas opcję, zatwierdzamy i zamykamy edytor rejestru.


To już wszystko, po wykonaniu tych zmian system nie będzie automatycznie instalował sterowników. Z opcji tej powinniśmy korzystać z rozwagą i tylko wtedy, gdy natkniemy się na jakieś problemy techniczne – w większości wypadków najlepszym wyjściem jest pozostawianie automatycznego instalowania. Zdecydowanie nie zalecamy natomiast całkowitego wyłączania Windows Update, bo mechanizm ten zapewnia krytyczne poprawki bezpieczeństwa. Jak można go skonfigurować zgodnie z własnymi potrzebami dowiecie się z innego naszego poradnika.

Here you can find, download and install Windows updates manually.
Random applications opening when pressing any key on the keyboard - Press the windows and alt key at the same time. This resolves the problem every time for me! Hope this helps.

How to manually install language pack on your Windows 10 20H2 system:
    Download FOD Disk ISO from here;
    Extract required language pack using something similar to AnyBurn utility;
    In your system press Win+R and type lpksetup.exe, select your .cab file and install it.


пʼятниця, 18 жовтня 2019 р.

How to create Hard and Soft Symbolic Links with mklink

Windows 10, 8, 7, and Vista all support symbolic links—also known as symlinks—that point to a file or folder on your system. You can create them using the Command Prompt or a third-party tool called Link Shell Extension.

What Are Symbolic Links?

Symbolic links are basically advanced shortcuts. Create a symbolic link to an individual file or folder, and that link will appear to be the same as the file or folder to Windows—even though it’s just a link pointing at the file or folder.
For example, let’s say you have a program that needs its files at C:\Program. You’d really like to store this directory at D:\Stuff, but the program requires that its files be at C:\Program. You could move the original directory from C:\Program to D:\Stuff, and then create a symbolic link at C:\Program pointing to D:\Stuff. When you relaunch the program, it will try to access its directory at C:\Program. Windows will automatically redirect it to D:\Stuff, and everything will just work as if it were in C:\Program.
This trick can be used for all sorts of things, including syncing any folder with programs like Dropbox, Google Drive, and OneDrive.
There are two type of symbolic links: Hard and soft. Soft symbolic links work similarly to a standard shortcut. When you open a soft link to a folder, you will be redirected to the folder where the files are stored.  However, a hard link makes it appear as though the file or folder actually exists at the location of the symbolic link, and your applications won’t know any better. That makes hard symbolic links more useful in most situations.
Note that Windows doesn’t actually use the terms “hard link” and “soft link”. Instead, it uses the terms “hard link” and “symbolic link”. In the Windows documentation, a “symbolic link” is the same thing as a “soft link”. However, the mklink command can create both hard links (known as “hard links” in Windows) and soft links (known as “symbolic links” in Windows).

How to Create Symbolic Links with mklink

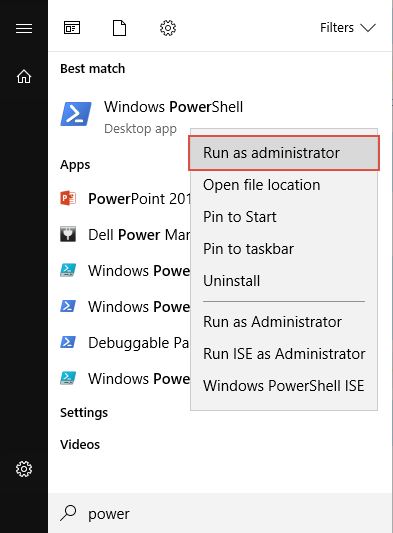
You can create symbolic links using the mklink command in a Command Prompt window as Administrator. To open one, locate the “Command Prompt” shortcut in your Start menu, right-click it, and select “Run as Administrator”.
On Windows 10’s Creators Update, you can use a normal Command Prompt window, without running it as an Administrator. However, to do this without an Administrator Command Prompt window, you must first enable Developer Mode from Settings > Update & Security > For Developers.
Without any extra options, mklink creates a symbolic link to a file. The below command creates a symbolic, or “soft”, link at Link pointing to the file Target :
mklink Link Target
Use /D when you want to create a soft link pointing to a directory. like so:
mklink /D Link Target
Use /H when you want to create a hard link pointing to a file:
mklink /H Link Target
Use /J to create a hard link pointing to a directory, also known as a directory junction:
mklink /J Link Target
So, for example, if you wanted to create a hard link at C:\LinkToFolder that pointed to C:\Users\Name\OriginalFolder, you’d run the following command:
mklink /J C:\LinkToFolder C:\Users\Name\OriginalFolder
You’ll need to put quotation marks around paths with spaces. For example, if the folders are instead named C:\Link To Folder and C:\Users\Name\Original Folder, you’d use the following command instead:
mklink /J "C:\Link To Folder" "C:\Users\Name\Original Folder"
If you see the message “You do not have sufficient privilege to perform this operation.”, you need to launch the Command Prompt as Administrator before running the command.
How to remove a symbolic link?
MKLINK cannot use to delete symbolic link. To remove a symbolic link, simply delete them as if you’re removing a normal file. Just make sure you don’t delete the original file.